Insects Arthropods Arachnids
How to start a beehive without buying bees
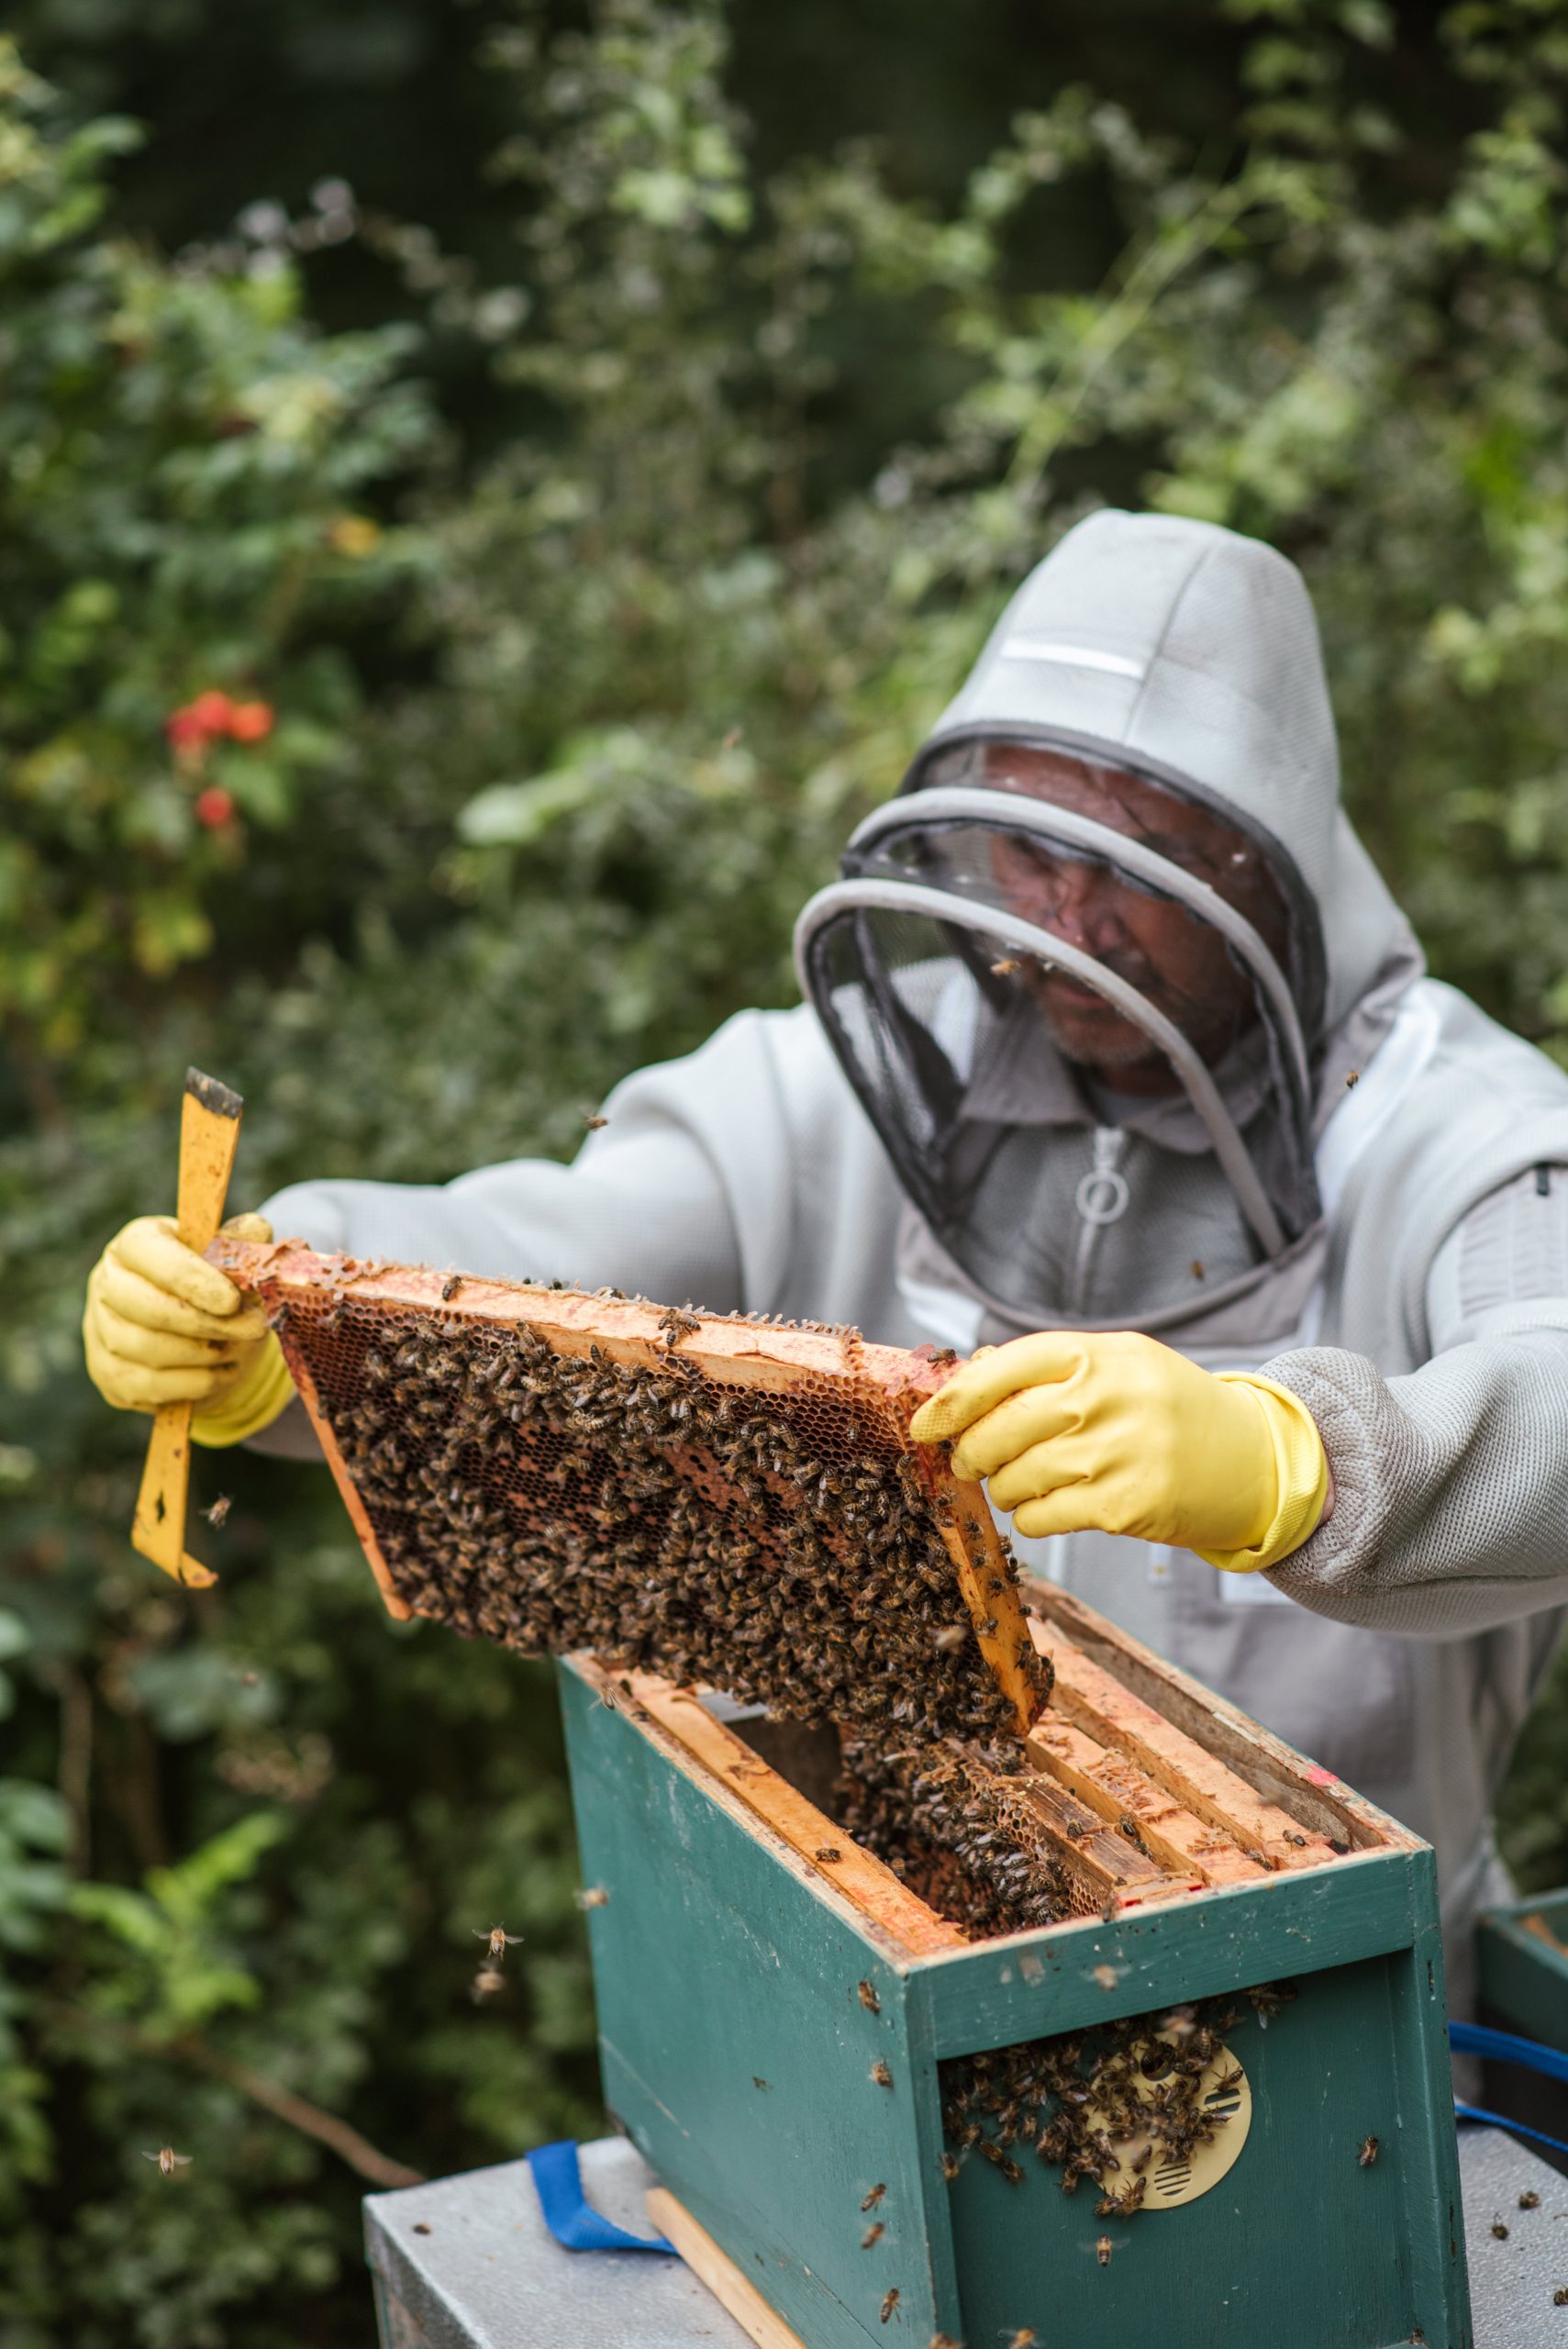
Are you looking to start your beehive, but don’t want to spend money on buying bees? If so, this blog post is the perfect guide for you! In this DIY guide, you will learn how to build your beehive and start your colony of bees without having to purchase them. This post will cover all the steps you need to take to get your beehive up and running, from collecting materials to installing the hive. Read on to learn how to start your beekeeping adventure without buying bees!
What You’ll Need
Starting a beehive is an exciting experience, but it does require a certain amount of materials and tools. To begin your journey into beekeeping, you’ll need:
-A hive body: This is the container where the bees will live and grow their colony. It should have frames that the bees can build their honeycomb on.
-Beehive frames: These are wooden frames that are placed inside the hive body to give the bees space to create and expand their honeycomb.
-Foundation: The foundation is a thin sheet of wax with a hexagon pattern already stamped onto it. This provides the bees with an easy way to build their honeycomb.
-A feeder: A feeder is used to give the bees food while they’re getting established in their new hive. It should be filled with sugar water or a beekeeper’s syrup.
-A bee suit or protective clothing: If you’re planning on interacting with the hive, you’ll need to wear a bee suit or protective clothing to avoid being stung by the bees.
-Tools: You’ll need some basic tools such as a hammer, nails, screws, and a saw.
Now that you’ve gathered all of the necessary supplies for starting a beehive, you’re ready to get started!
The build process
When it comes to starting a beehive, the most important part of the process is the build. The hive’s design will largely depend on the type of bees you plan to keep. For example, for honeybees, you should build an 8- or 10-frame Langstroth hive, which consists of deep and medium frames that contain the brood chamber, honey supers, and other features.
Before you build your hive, you’ll need to ensure you have all the necessary materials. A basic list of items you’ll need includes lumber (for frames and external parts of the hive), nails, screws, glue, paint or varnish, foundation wax, screen material, a bee brush, hive tools, and a bee suit.
Once you’ve gathered all the materials you need, you can begin constructing your hive. Start by cutting out the wood according to your plans. Then use the nails and glue to assemble the frames and the external parts of the hive. Next, you can paint or varnish your hive for protection against weather conditions. Finally, insert the foundation wax into the frames so that the bees will have something to build their combs from.
Once the hive is built, it’s time to move on to the next step: collecting your swarm.

After your hive is built
Congratulations! You have successfully built your beehive! Now it’s time to wait for the bees to come.
Depending on the season, you may have to wait anywhere from a few weeks to several months for your bees to arrive. If you plan on obtaining your colony from a beekeeper, you will need to inquire about the availability of bee packages or bee swarms.
Once your hive is in place and ready to receive your new colony, there are some steps you can take to help ensure the success of your beehive. Make sure to monitor your hive regularly and look out for signs of pests or diseases. If needed, treat any problems with approved treatments such as boric acid or other natural methods.
Also, keep an eye out for any honeycomb that has been built, and make sure to harvest any honey that is present in your hive. Honey harvesting should only be done after the queen has been identified and the colony is healthy and stable.
Finally, remember to take some time to enjoy the process! Beekeeping is a rewarding hobby, so take some time to observe your hive and admire the hard work of your bees. Good luck!
Collecting your swarm
One of the most exciting parts of starting a beehive is the process of collecting your swarm! This is the natural way to obtain bees for your hive, without having to purchase them from a supplier. Before attempting to collect your swarm, it’s important to make sure you are familiar with the laws in your area concerning beekeeping.
To attract a swarm of bees to your hive, you can place a swarm trap near the area where they will be kept. A swarm trap consists of an empty bee box with foundationless frames, which is hung on a tree or post in an area where there are likely to be swarms of bees. Make sure that the box is located in an area where there is plenty of sunlight, away from other bee colonies.
Once your swarm trap is in place, you can wait for a swarm to arrive! Once they have taken up residence in your swarm trap, you will need to transfer them to your newly built beehive. To do this, you can use a bee brush and gently brush the bees into the hive box, then close the lid.
Make sure to monitor your hive closely for the first few weeks after the bees have been transferred. This is when they are most vulnerable, so be sure to check for signs of distress such as lack of food or disease. With proper care and attention, you should have a thriving hive in no time!
Maintaining your hive
Now that you have your hive built and a swarm of bees living in it, it’s time to start maintaining your colony. The most important thing is to make sure your hive is getting the right amount of nutrition and keeping it free of disease.
- Feeding your Bees: Bees need to eat both nectar and pollen to survive, so it’s important to make sure your colony has access to a reliable source of these resources. You can either purchase bee food from a beekeeping supply store or grow flowering plants such as lavender, bee balm, and clover in your yard to attract bees.
- Monitoring Disease: Keeping your bees healthy means monitoring the hives for signs of disease. Common diseases to look out for include American Foulbrood, European Foulbrood, and chalkbrood. If you suspect that one of these diseases is present, contact a beekeeping expert as soon as possible.
- Replacing Old Honeycombs: As your bees work hard to build honeycombs, they will eventually become too old to be used again. To keep the hive healthy and productive, it’s important to replace these old combs with new ones periodically.
- Providing Water: Make sure that your bees have access to a clean source of water, as this will help them stay hydrated and regulate their internal temperature. A shallow dish with rocks in it can provide them with a safe drinking spot.
By following these maintenance tips, you can ensure that your hive remains productive and healthy for years to come. With the right care and dedication, you can even turn your hobby into a profitable business!
Read Also :
How can I become a beekeeper?
How many bees are in the world
1 Comment
Leave a Reply
Cancel reply
Insects Arthropods Arachnids
Get Started: How to Raise Crickets at Home for Profit
Are you interested in learning how to raise crickets for profit? If so, you’ve come to the right place. Raising crickets for profit is becoming a popular way for people to make extra income. In this blog post, we will discuss how to get started raising crickets and the basics of setting up a successful cricket-raising operation. Whether you’re looking for an additional source of income or a fun and rewarding hobby, raising crickets can be an excellent way to make money.
Why Crickets?
Are you interested in starting a small business from home? Raising crickets for profit may be the perfect opportunity for you. Crickets are a sustainable source of protein that is in high demand for a variety of industries including pet food, fishing bait, and human consumption.
Not only is there a market for crickets, but they are also easy to care for and require minimal space to raise. Many cricket farms operate in urban areas using vertical farming techniques. Additionally, crickets have a fast reproduction rate and can produce hundreds of offspring within a few weeks.
By raising crickets for profit, you have the opportunity to create a sustainable business that provides a valuable resource to various industries. With the right knowledge and resources, you can successfully raise and sell crickets for a profit. In the next sections, we will go over what you need to get started, how to set up your cricket farm, care for your crickets, breed your crickets, and market and sell your crickets.
What You Need to Start
If you’re interested in raising crickets, the first step is to ensure that you have everything you need to get started. Here are the essential items you will need to raise crickets at home:
- Cricket Containers:
The containers you choose to raise your crickets in must be spacious, well-ventilated, and made of durable materials that won’t break down over time. You can use plastic storage boxes or glass aquariums to keep your crickets in.
- Cricket Feed:
To keep your crickets healthy and well-fed, you will need to provide them with a varied diet. You can purchase commercial cricket feed, but you can also give your crickets fresh fruits, vegetables, and grains like oatmeal.
- Water Source:
Your crickets will need access to a reliable water source, either through a water bowl or by misting their habitat with a spray bottle. Be sure to change the water daily to keep it fresh and free of bacteria.
A suitable substrate, such as egg cartons, paper towel rolls, or coconut fiber, is necessary for crickets to lay eggs and crawl around on. It should be easy to clean and provide enough space for your crickets to burrow and hide.
- Thermometer and Hygrometer:
Monitoring temperature and humidity is critical for the success of your cricket farm. You’ll need a thermometer and a hygrometer to measure and adjust the conditions in your cricket habitat.
- Heat Lamp:
If you’re planning on raising crickets in cooler temperatures, you may need a heat lamp to maintain a constant temperature in your cricket containers.
By gathering all of the materials listed above, you’ll have the essentials for creating a successful cricket farm at home. The next step is to set up your cricket habitat and start caring for your crickets.
Setting Up Your Cricket Farm
Now that you’ve decided to start a cricket farm, it’s time to set up your space. Here’s what you’ll need:
- Space: You don’t need a lot of room, but you do need enough to fit your cricket enclosures. A small room or basement will work well.
- Enclosures: Your crickets will need space to move around, so you’ll need enclosures that are large enough for them to thrive. A 10-gallon aquarium works well for about 1,000 crickets.
- Substrate: Crickets like to burrow, so they’ll need a substrate to live in. You can use peat moss, vermiculite, or a mixture of both.
- Water: Your crickets will need a source of water, so make sure they have access to it. You can use a water dish or a sponge.
- Food: Crickets will eat almost anything, but they do need a source of protein. You can feed them dog food, fish food, or even cat food. You’ll also want to give them fruits and vegetables.
- Heat: Crickets like it warm, so you’ll need to provide them with a heat source. A heating pad or lamp will work well.
- Lighting: Crickets need light, but not too much. You can use a 12-hour cycle of light and darkness.
Setting up your cricket farm may take some time and effort, but once you have everything in place, it’s easy to care for your crickets and start breeding them for profit.
Caring for Your Crickets
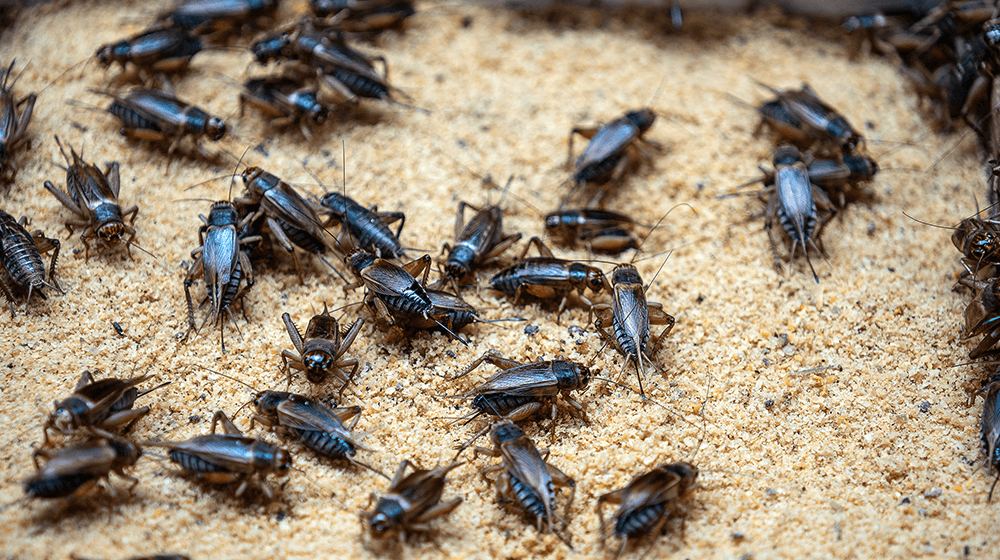
Now that your cricket farm is up and running, it’s important to ensure that you’re providing the best possible care for your crickets. Here are some tips to keep your cricket colony healthy and thriving:
- Temperature and Humidity Control:
Crickets thrive in warm and humid environments, so it’s important to keep the temperature and humidity levels consistent. The ideal temperature for crickets is around 85°F, while the humidity level should be around 60-70%.
- Feeding and Watering:
Crickets need a constant supply of food and water. Feed your crickets a high-protein diet that includes grains, fruits, and vegetables. Ensure that there is always fresh water available for your crickets to drink.
Keeping your cricket farm clean is essential for maintaining a healthy environment for your crickets. Remove any dead or diseased crickets, as well as any debris or waste that accumulates in the enclosure.
- Pest Control:
As with any farming operation, pests can become a problem. Keep a watchful eye out for any pests that could harm your crickets, such as mites or flies. Regular cleaning and good hygiene practices can help prevent infestations.
Watch your crickets closely for any signs of stress or disease. Crickets that are inactive or have discolored bodies may be sick and need to be isolated from the rest of the colony.
By providing your crickets with proper care and attention, you’ll ensure a healthy and thriving colony that will provide a steady source of income for your business.
Breeding Your Crickets
Once you have set up your cricket farm, you’ll want to start breeding your crickets. The breeding process is essential to ensure a continuous supply of crickets and maximize your profit potential.
First, you’ll need to determine which crickets you want to breed. If you have both male and female crickets in your colony, breeding will happen naturally. However, if you only have one sex, you’ll need to purchase the opposite sex from a supplier.
Once you have both male and female crickets, you’ll want to create a breeding container that is at least six inches deep. The container should be filled with soil or another substrate that will allow the female cricket to lay her eggs. Provide food and water for your crickets.
When your crickets have mated, the female will lay eggs on the substrate. It’s essential to remove any dead crickets and uneaten food from the container as they can attract mold and harmful bacteria. After approximately two weeks, the eggs will hatch, and tiny crickets will emerge.
To maximize your cricket breeding potential, ensure that the breeding container is maintained correctly. Keep it at a consistent temperature of around 85°F and keep it humid by spraying it with water every few days. You’ll want to continue the breeding process to ensure a continuous supply of crickets for your customers.
Marketing and Selling Your Crickets
After successfully raising a colony of crickets, it’s time to market and sell your product. There are several avenues you can explore to reach potential customers and make a profit from your efforts.
One effective marketing strategy is to establish partnerships with local pet stores, reptile enthusiasts, or bait and tackle shops. These establishments often have a high demand for live crickets and may be willing to buy from local suppliers. Reach out to them, introduce your product, and offer competitive prices and convenient delivery options.
Another approach is to create an online presence through social media platforms and your website. Use captivating images and detailed descriptions to showcase the quality of your crickets. Engage with your audience by sharing interesting facts about crickets or providing care tips for pet owners. Additionally, consider offering online ordering and shipping options to attract customers beyond your local area.
You can also participate in trade shows or community events related to reptiles, gardening, or pet ownership. This will allow you to interact directly with potential customers, answer their questions, and showcase your product. Distribute business cards, brochures, or samples to leave a lasting impression.
Lastly, consider reaching out to cricket farms or insect suppliers who may be interested in purchasing your excess stock. This can help ensure a consistent revenue stream and prevent any waste of your valuable resources.
Remember, building a customer base takes time and effort, so be patient and persistent. With effective marketing strategies and quality crickets, you can turn your passion for cricket farming into a profitable venture.
Read Also:
How to breed with crickets
Raising crickets for reptiles
Insects Arthropods Arachnids
What bees are native to north america
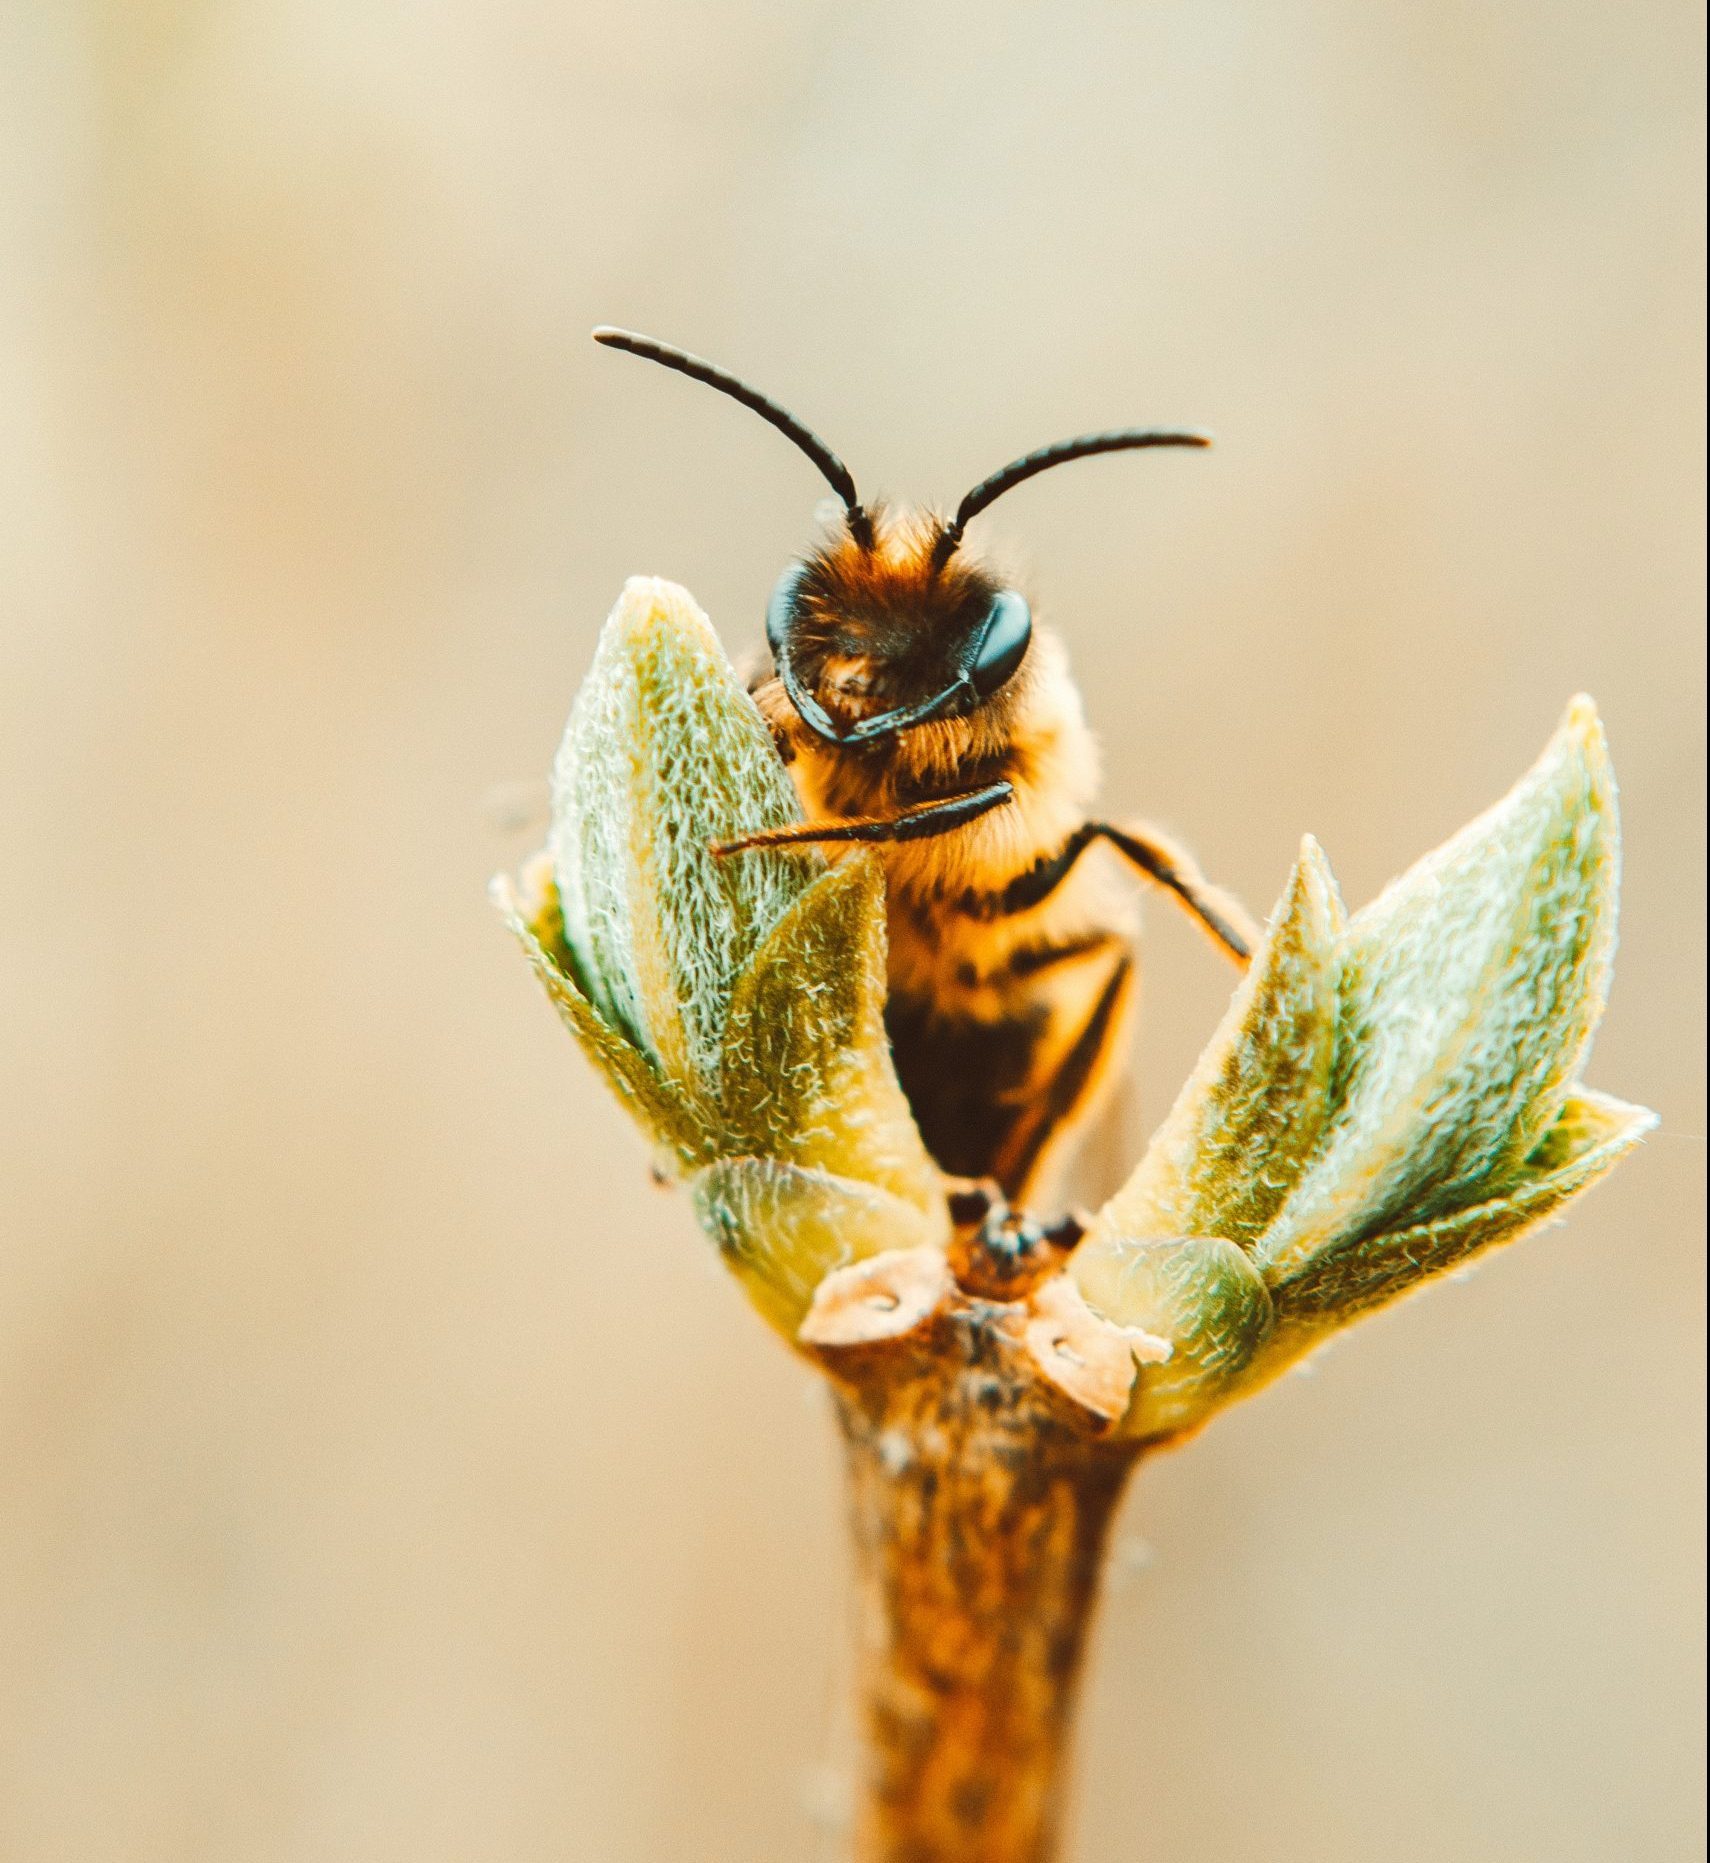
Did you know that 10 different types of bees are native to North America? Bees are an important part of our natural ecosystem, and they play a crucial role in the pollination of plants. In this blog post, we will be exploring the 10 native bees found in North America, including their unique characteristics and habitats. Keep reading to learn more about these fascinating creatures!
1) The bumble bee
One of the most common and beloved bees native to North America is the bumble bee. These hard-working insects can be found across the United States and Canada, and play a vital role in pollinating many of our favorite plants. Bumble bees are known for their distinctive black and yellow stripes and large size compared to other bees. They are social insects that live in colonies of up to several hundred bees, with one queen bee leading them. Bumble bees feed on nectar and pollen from a variety of flowers, and they are especially adept at pollinating tomatoes, peppers, and other vegetables.
2) The carpenter bee
Native to North America, the carpenter bee (Xylocopa Virginia) is a large, black, and yellow bee that gets its name from its nesting habits. Carpenter bees bore holes in wood, creating nests for their young. They can also be found around pollinator-friendly gardens. They typically feed on nectar and pollen from flowers, but some species of carpenter bees may also feed on small insects. While they are solitary bees, they are often seen in large numbers when they are searching for food sources. Carpenter bees are important pollinators and have an important role in maintaining healthy ecosystems.
3) The cuckoo bee
The cuckoo bee is a native bee to North America, known for its unusual behavior. Cuckoo bees are social parasites and do not build their nests. Instead, they lay their eggs in the nests of other species of bees. The eggs hatch and the larva feed on the host bee’s food stores, often killing the host larvae in the process. Cuckoo bees are typically around 8-10 millimeters long and have a mostly black body with yellow bands on the abdomen. They are solitary bees and generally feed on pollen and nectar from a variety of flowers, including clover, alfalfa, goldenrod, and aster. Cuckoo bees can be beneficial for pollination but can also be damaging to other species of bees if their populations become too large.
4) The leaf-cutter bee
The leaf-cutter bee is native to North America and is the region’s most efficient pollinator of wildflowers. Leaf-cutter bees are small, about 1/4-3/4 inch long, and are colored black and yellow. The name comes from these bees using leaves to make their nests. They collect small pieces of leaves to line the inside of their nests and form a protective barrier for the eggs.
Leaf-cutter bees feed on nectar and pollen from wildflowers and have been used as an important source of pollination for many crops. These bees are solitary insects and do not live in colonies or hives like other bees. They can be found in gardens, meadows, and open fields, but they prefer areas with abundant wildflowers.
Leaf-cutter bees are beneficial to the environment because they help pollinate wildflowers, increase crop yields, and provide a habitat for other species of insects. For these reasons, it is important to protect these bees and ensure their populations remain stable.
5) The mining bee
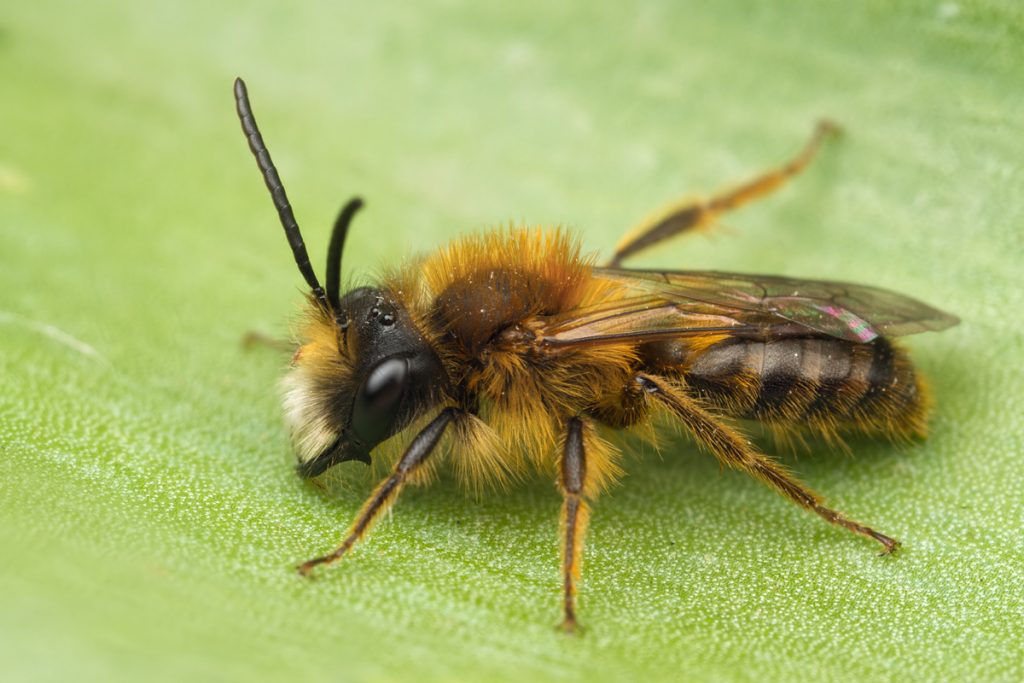
The mining bee is a solitary bee that can be found all over North America. It is small and usually brown with pale yellow or white stripes. The mining bee is a ground-nesting species, that digs small tunnels in the soil. They use these tunnels to lay their eggs and store pollen for their young.
The mining bee feeds on nectar and pollen from a variety of plants, including flowers, herbs, trees, and grasses. Unlike honey bees and bumble bees, mining bees do not live in large colonies; they are solitary creatures that live independently.
Mining bees play an important role in pollinating plants and crops, and they are considered beneficial insects. They are generally harmless to humans and pets and rarely sting.
If you spot a mining bee around your garden or yard, don’t worry! While they may look intimidating, these bees are harmless and beneficial for your garden.
6) The Mason bee
The mason bee, also known as the ‘orchard mason bee’, is a native species to North America. They get their name from their habit of building nests in pre-existing holes and cracks, such as those in decaying wood and even man-made structures.
Mason bees are important pollinators for many plants, especially fruits, and nuts like apples, cherries, strawberries, blueberries, and almonds. Mason bees have a short but effective flight season – usually occurring between April and June in most regions of North America. During this time, they will gather pollen and nectar from nearby flowers, carrying them back to their nests.
Mason bees are generally small and metallic-blue in color with long antennae and a cylindrical body. Males have black eyes while females have reddish-brown eyes. They feed on a variety of pollen and nectar sources, such as flowering shrubs and trees, dandelions, clover, and other common wildflowers.
Mason bees are not social bees, meaning they do not live in colonies or hives like other bee species. Instead, they construct solitary nests where they lay their eggs, which hatch into larvae that will eventually form cocoons before emerging as adult bees.
To attract mason bees to your garden or landscape, you can offer them plenty of nesting sites like hollow plant stems or pre-drilled holes in blocks of wood. You can also provide them with plenty of pollen and nectar sources by planting a variety of flowering plants and herbs.
7) The squash bee
One of the most fascinating and important native bees found in North America is the squash bee. As their name suggests, these bees specialize in pollinating squash, pumpkin, and gourd plants. Without the help of the squash bee, these important crops would not thrive, making them essential to our food supply.
The squash bee is a solitary bee, which means they do not live in colonies like honeybees. Instead, they live underground in tunnels they excavate in the soil. They are active from late spring to early fall, emerging when the flowers of their preferred plants begin to bloom.
Unlike the sweat bee, the sunflower bee, and the tobacco bee, the squash bee is quite easy to identify. They have distinctive striped patterns on their abdomen and their wings are tinged with a metallic green color. Female squash bees have specialized hairs on their legs that they use to carry pollen from one flower to another.
Interestingly, the squash bee has a symbiotic relationship with the Cucurbitaceae family of plants, which includes squash, pumpkins, and gourds. The bees time their emergence with the blooming of these plants, and they have evolved to be highly efficient pollinators of their preferred crops.
If you want to support the health of native bee populations, consider planting some squash, pumpkin, or gourd plants in your garden. This will not only benefit the squash bee but also other pollinators, including the sweat bee, the sunflower bee, and the tobacco bee.
8) The sweat bee
If you’ve ever noticed a tiny bee hovering around your sweaty skin, you may have encountered a Sweat Bee! These bees are small and black with green, blue, or metallic markings. They are attracted to the salt in our sweat, hence their name.
Sweat Bees are a diverse group, with over 1000 species in North America alone. They are often found in gardens and meadows, where they feed on nectar and pollen from flowers. They are important pollinators of many native plants, as well as crops like blueberries and strawberries.
Despite their reputation as a nuisance to humans, Sweat Bees are generally docile and not aggressive. They are unlikely to sting unless provoked, and even then their stings are relatively mild compared to other bee species.
If you want to attract Sweat Bees to your garden, plant flowers that are rich in nectar and pollen, such as goldenrod, asters, and bee balm. Providing a source of fresh water can also be beneficial. And next time you see a Sweat Bee buzzing around you, appreciate it for the important role it plays in our ecosystem!
9) The sunflower bee
As the name suggests, the sunflower bee is a bee species that loves sunflowers. They are one of the few bees that can effectively pollinate sunflowers, and as such, they are an important pollinator of this crop.
The sunflower bee is a medium-sized bee that measures around 1/2 inch in length. They are known for their long tongues that allow them to easily access the nectar of sunflowers. The females of this species have black and yellow stripes on their abdomen, while the males have longer antennae and smaller bodies.
Like many other bees, the sunflower bee is a solitary bee. Females will build their nests in the ground, usually in sandy soil. They will create individual cells in the nest and lay a single egg in each cell, along with a supply of pollen for the developing larva to feed on.
While sunflowers are their preferred food source, the sunflower bee will also feed on other plants, including asters, goldenrod, and wild bergamot. They are active in the late summer and early fall when sunflowers are in bloom.
Unfortunately, like many other bee species, the sunflower bee is facing threats to its population. Habitat loss and the use of pesticides are just two of the many factors that are contributing to the decline of bee populations across North America. By planting native flowers and reducing our use of pesticides, we can help protect bees like the sunflower bee and ensure their survival for years to come.
10) The tobacco bee
The tobacco bee, also known as the pallid bee, is a native North American bee that primarily feeds on the nectar and pollen of tobacco plants. They can be found throughout the eastern United States, from New England down to Florida and west to the Mississippi River.
The tobacco bee is a small, slender bee with pale yellow to white hair on its body. They are often mistaken for other types of bees, such as the sweat bee, due to their similar appearance. However, they can be identified by their elongated mouthparts, which they use to extract nectar from deep flowers.
While the tobacco bees may seem like a niche pollinator, they play an important role in the ecosystem. They are effective pollinators for a variety of plants beyond tobacco, such as milkweeds, asters, and goldenrods.
Unfortunately, like many other native bee species, the tobacco bee’s populations have declined due to habitat loss, pesticide use, and disease. By planting native wildflowers and reducing pesticide use in our gardens, we can help support these important pollinators.
So the next time you spot a tiny, pale bee buzzing around your garden, take a closer look. It just might be a tobacco bee, working hard to keep our ecosystems healthy and thriving.
Read Also :
How can I become a beekeeper?
How to start a beehive without buying bees
Insects Arthropods Arachnids
How many bed bugs hatch at a time
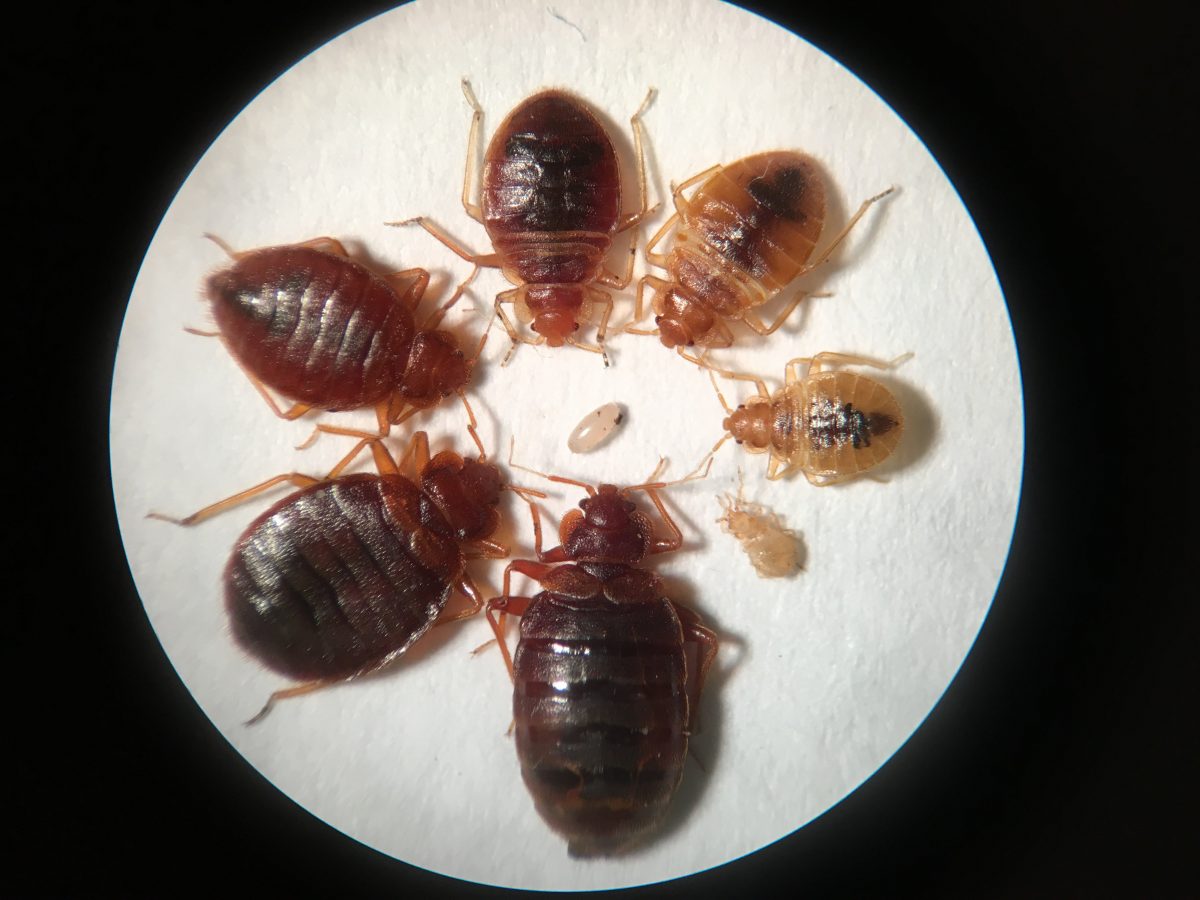
Have you ever wondered how many bed bugs hatch at a time? It may surprise you to learn that a single brood of bed bugs can hatch anywhere from one to several hundred eggs, depending on the size of the bed bug infestation. In this blog post, we will explore the number of bed bugs that hatch in a single brood, as well as the impact an infestation can have on a home or business. Read on to find out more about the reproduction habits of bed bugs and how to protect yourself against an infestation.
How Many Bed Bugs Are in a Single Brood?
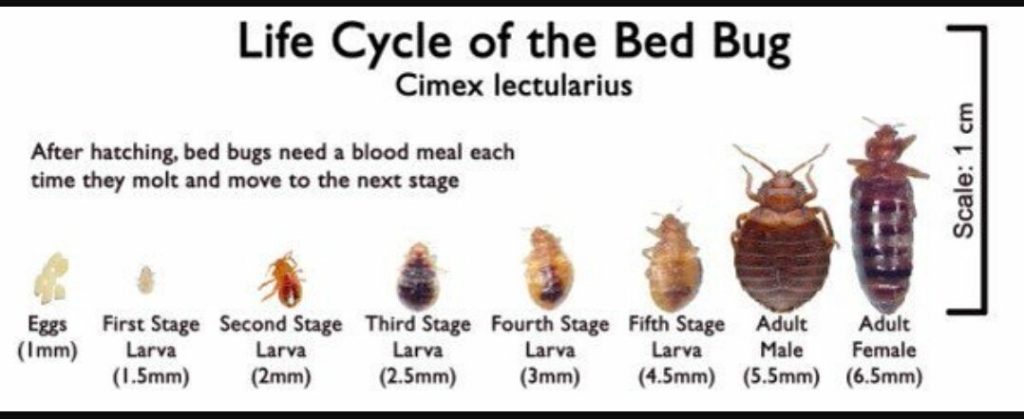
The number of bed bugs in a single brood can vary depending on the species and time of year. Generally, bed bugs lay eggs in clusters of 10-50 eggs, which can hatch anywhere from 6 to 10 days later. Depending on the species, each female bed bug is capable of laying up to 500 eggs in her lifetime, with a single brood containing anywhere between 3 and 30 bed bug nymphs. The number of bed bugs in a single brood can also vary depending on the temperature and humidity levels; ideal conditions will lead to larger broods. Additionally, multiple females can lay eggs in the same area over time, leading to even larger broods.
What Factors Determine How Many Bed Bugs Are in a Brood?
The number of bed bugs that hatch in a single brood can vary significantly depending on a variety of factors. Temperature and humidity levels in the home, as well as the availability of food, play a role in determining how many bed bugs will be present in a single brood.
Temperature is an important factor for bed bug reproduction, as the insect prefers warm temperatures for its development. Bed bugs typically reproduce at temperatures between 65°F and 80°F. During colder months, the eggs may take longer to hatch, resulting in fewer bed bugs in a single brood.
Humidity levels are also an important factor for bed bug reproduction, as high humidity levels help the eggs to develop. In environments with low humidity, bed bugs may take longer to hatch, resulting in fewer bed bugs in a single brood.
Finally, the availability of food sources plays an important role in determining how many bed bugs will be present in a single brood. Bed bugs feed on blood, so if there are no human or animal hosts in the area, the number of bed bugs hatched in a single brood may be significantly lower.
Overall, temperature, humidity, and availability of food sources all play a role in determining how many bed bugs will be present in a single brood.
What is the Largest Number of Bed Bugs Ever Found in a Single Brood?
The largest number of bed bugs ever found in a single brood was a staggering 1,000 eggs! This was reported in a study conducted in the Netherlands, where researchers identified 1,000 eggs in one single batch of eggs. Even larger batches may exist, but this was the largest known so far.
It is estimated that bed bugs can lay anywhere from one to five eggs per day, so it stands to reason that large batches of eggs can accumulate over time. Female bed bugs can lay up to 500 eggs in their lifetime, so it is important to catch infestations early before they reach this stage.
The largest single brood of bed bugs provides a unique opportunity for researchers to better understand the behavior and biology of these pests. It also highlights the importance of staying vigilant when it comes to preventing and detecting infestations before they become too large. If you suspect a bed bug infestation, be sure to call a pest control professional immediately to get the issue taken care of.
Read Also :
Is bed bugs black
How to prevent bed bugs
Trending

 Cats1 year ago
Don’t Feed Your Cat These 8 Foods!

 Cats8 months ago
Why Do Cats Spray and How Can You Stop Them? Insights into Urine Spraying in Male Cats

 Dogs2 years ago
So You’re Thinking About Getting a Poodle

 Birds1 year ago
The Perfect Blend for Your Birds: Birds and Blend

 Cats8 months ago
Pre-Vaccination Prep: Getting Your Cat Ready

 Cats8 months ago
The Ins and Outs of Cat Sterilization: Removing the Female’s Ovaries

 Horses1 year ago
Don’t Go Horse Shopping Without Checking This Dressage Horse Shopping Checklist First!

 Dogs8 months ago
What to Do With Your Dog’s Body After Death: A Guide for Pet Owners




Pingback: How can i become a beekeeper - Gentel Life Plus
Pingback: Bees and your neighbors and the law - Gentel Life Plus
Pingback: How much bees are in the world - Gentel Life Plus